NS2网络仿真基础教程——TCP和UDP协议仿真
1、第一步:验证NS2仿真环境
本教程的环境为centOS6.0+NS2 2.35。关于Linux以及NS2的安装已经有大量的优秀教程,希望小伙伴可以查找相关资料配置好基本的运行环境。
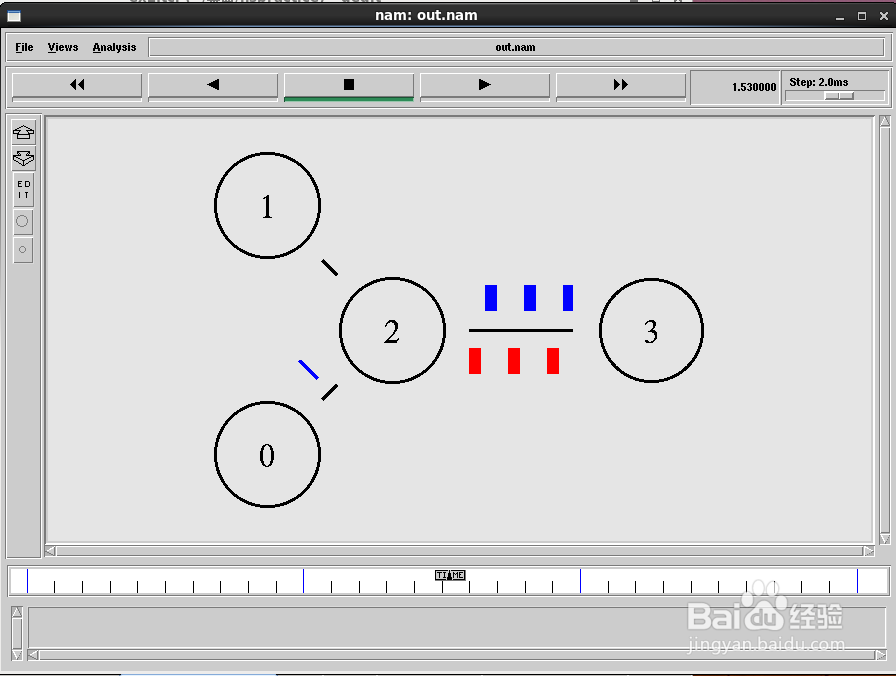
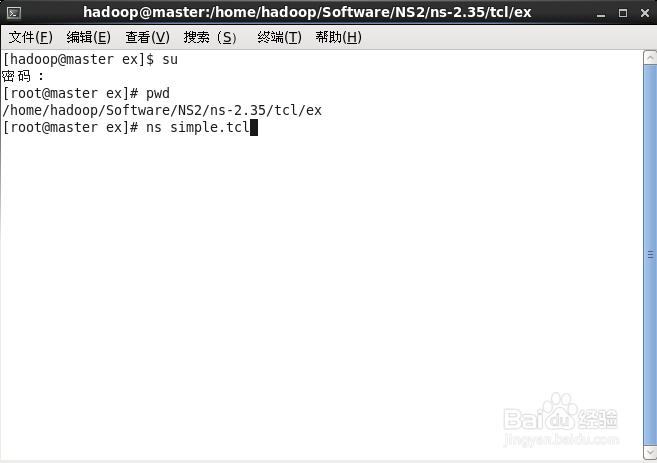
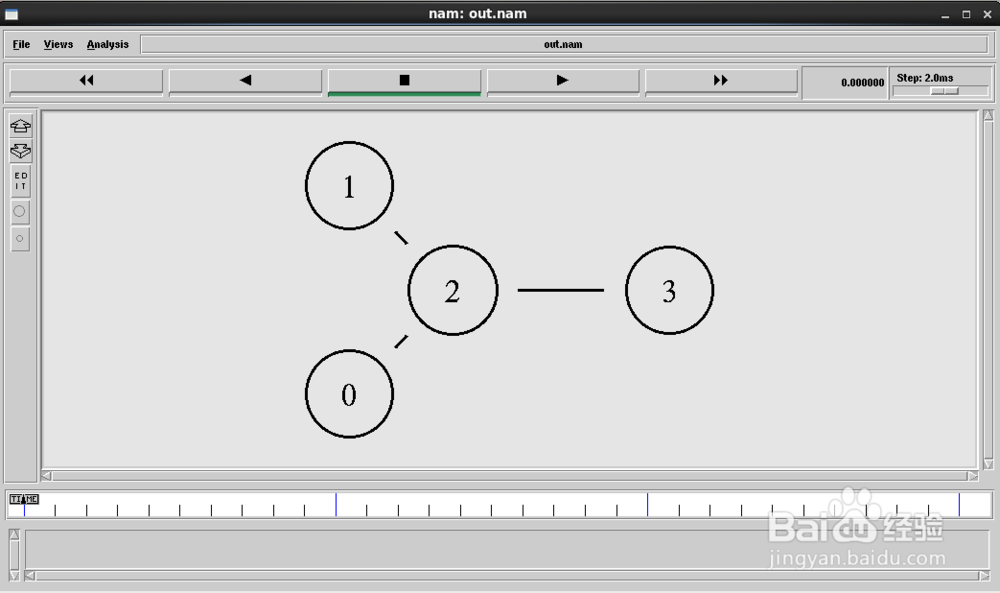
验证方法如下:找到NS2的安装路径,并找到~/ns-2.35/tcl/ex文件夹下的simple.tcl文件,使用命令行命令:ns simple.tcl,在正常环境下会出现nam程序界面以及一个网络仿真拓扑图。
2、第二步:网络规划
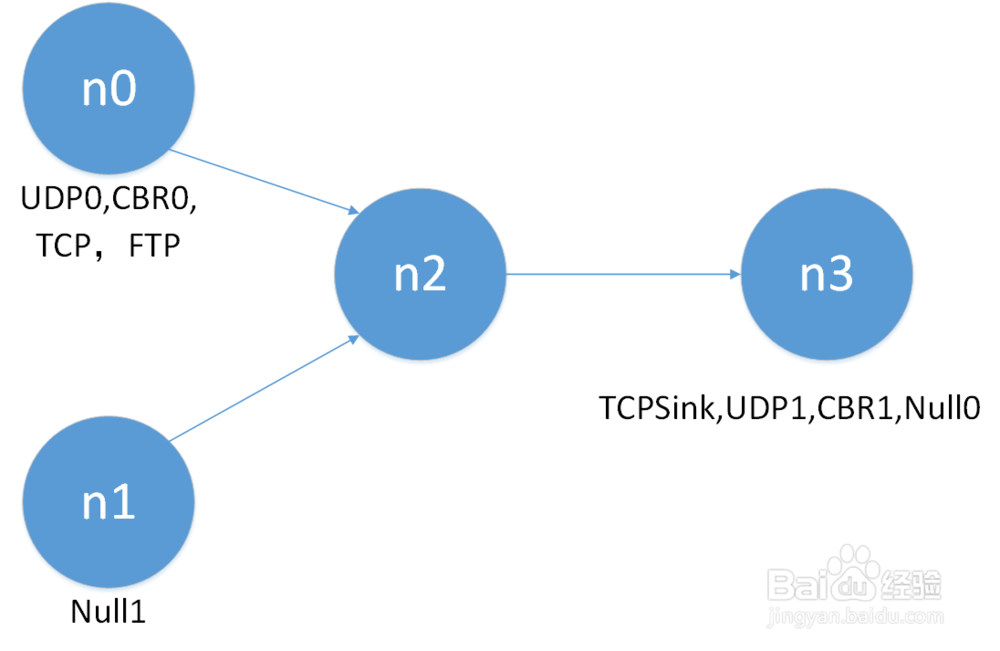
节点数量:网路包含4个节点分别记为n0、n1、n2、n3。
链路数量:包含3条通信链路n0到n2,n1到n2,n2到n3。
协议代理(Agent):Agent/UDP, Agent/TCP
数据源:恒定速率发生器(CBR)
3、第三步:创建仿真脚本文件ex1.tcl
tcl脚本文件可以通过gedit进行编辑。

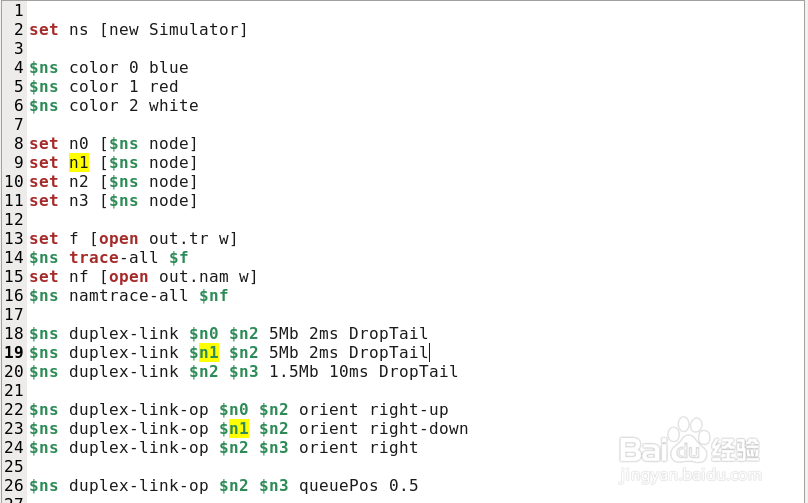
4、第四步:创建仿真器,定义网络原件,网络运行过程的追踪文件
set ns [new Simulator]
$ns color 0 blue
$ns color 1 red
$ns color 2 white
set n0 [$ns node]
set n1 [$ns node]
set n2 [$ns node]
set n3 [$ns node]
set f [open out.tr w]
$ns trace-all $f
set nf [open out.nam w]
$ns namtrace-all $nf
$ns duplex-link $n0 $n2 5Mb 2ms DropTail
$ns duplex-link $n1 $n2 5Mb 2ms DropTail
$ns duplex-link $n2 $n3 1.5Mb 10ms DropTail
$ns duplex-link-op $n0 $n2 orient right-up
$ns duplex-link-op $n1 $n2 orient right-down
$ns duplex-link-op $n2 $n3 orient right
$ns duplex-link-op $n2 $n3 queuePos 0.5
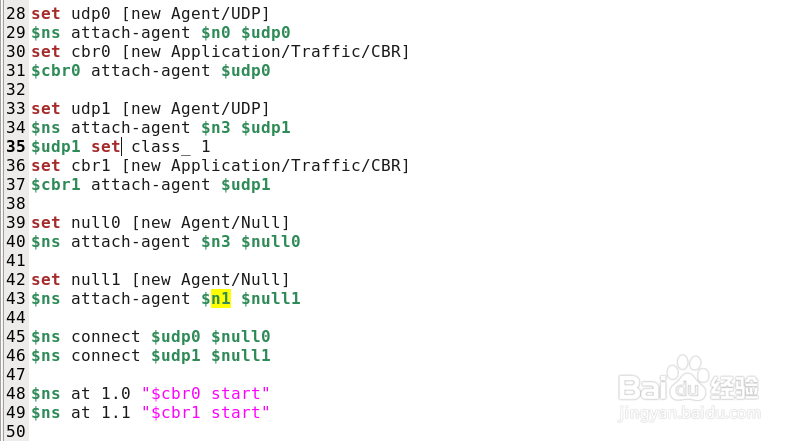
5、第五步:创建udp协议代理,cbr数据发生器,将二者绑定,并在1.1 和1.2秒启动两个数据发生器
set udp0 [new Agent/UDP]
$ns attach-agent $n0 $udp0set cbr0 [new Application/Traffic/CBR]
$cbr0 attach-agent $udp0
set udp1 [new Agent/UDP]
$ns attach-agent $n3 $udp1
$udp1 set class_ 1
set cbr1 [new Application/Traffic/CBR]
$cbr1 attach-agent $udp1
set null0 [new Agent/Null]
$ns attach-agent $n3 $null0
set null1 [new Agent/Null]
$ns attach-agent $n1 $null1
$ns connect $udp0 $null0
$ns connect $udp1 $null1
$ns at 1.0 "$cbr0 start"
$ns at 1.1 "$cbr1 start"
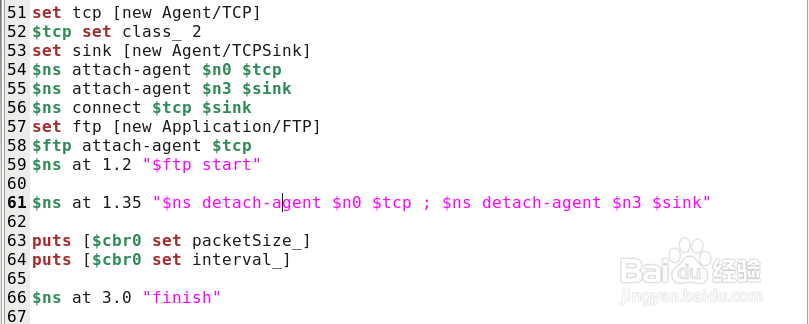
set tcp [new Agent/TCP]
$tcp set class_ 2
set sink [new Agent/TCPSink]
$ns attach-agent $n0 $tcp
$ns attach-agent $n3 $sink
$ns connect $tcp $sink
set ftp [new Application/FTP]
$ftp attach-agent $tcp
$ns at 1.2 "$ftp start"
$ns at 1.35 "$ns detach-agent $n0 $tcp ; $ns detach-agent $n3 $sink"
puts [$cbr0 set packetSize_]
puts [$cbr0 set interval_]
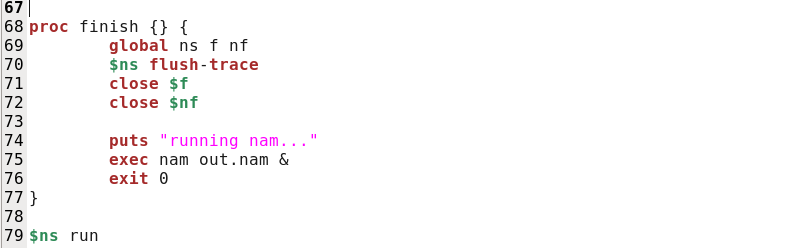
6、第六步:定义仿真结束过程,在该过程中关闭两个记录文件。最后,使用run命令启动仿真。
proc finish {} {
global ns f nf
$ns flush-trace
close $f
close $nf
puts "running nam..."
exec nam out.nam &
exit 0
}
$ns run